
So far so good….
Well, it’s been a while since I’ve wanted to take the time out to post another entry in my “blog”, per se. So obviously, my title is self-explanatory. I’m all about avoiding pesticides and GMOs. I also have incorporated Paleo methods of eating. I have been wanting to try to improve my health, and the overall way I eat. Also trying to do it in an economical way, since organic food is not the cheapest due to the cost of labeling etc. I took about 3 months of heavy reading & learning, though I’ve been following agricultural methods, along with botany. I want to be able to read plants, important for making sure to spot sign of an infestation or other stress so the work of nurturing is not wasted.
I did wait some time to start my garden, because I wanted to be sure of what type of grow method would work best for me. Three main ways of cultivating plants would be hydroponic, composted soil, or aeroponics. I went with regular soil with compost and “bumper crop”, because I wanted to get all I could, nutrient wise. This is basically the oldest method used once farming was somewhat established.
So now that I had my method, I needed an economical way of finding enough planters to grow all the varieties of plants I wanted. I’ve seen people use storage tubs or buckets or whatever else could be found around the garage or house. I stay away from any container that had some chemical stored or spilled in it… I want to have my food as healthy can be. I used gallon sized water jugs, 5 lbs used soil bags or perlite, etc., coffee containers, juice containers…. basically whatever I could find and got done consuming. I gathered a bunch of “brooder” lights, 4′ workshop lights, and 1 window fan (2′ sq type).
It was the end of august by the time I had things figured out… then just the matter of gathering the best ingredients for my soil. I already had a bumper crop, because I do work with plants on a regular basis, whether they are outdoor or indoor ones. The only thing is, most of the plants are decorative and have different needs from veggie plants… or fruit plants. The other thing was finding a medium to use as a “thinner” for the aeration of the soil, using things like perlite, sand, or straw. I prefer to use the course sand and perlite, over the straw because straw tends to mold if I need high moisture conditions more so than the perlite or sand.
What else do I need? Seeds. I tried to scour the internet for inexpensive small packets of non-GMO & some heirloom seeds, but it somewhat hard to find reputable stores with decent prices.
Last, but not least…. where? Where am I going to put my plants? I already knew I wanted to plant indoors from the start… but it took me much longer to jump into it without having a south-facing windowed room to utilize. What I ended up doing was setting it up in my office room/daughter’s classroom. It has a north & east facing window, which is not enough light to grow veggies, especially starting in the fall through winter. That’s why I brought in all the lights to supplement somewhat and just give it a shot. I didn’t have much to lose, and even if worst case scenario happened, like all the time & money into this while having no success… this time around. I can reuse the containers, soil, and use seeds left over from 1st try. The valuable lessons from experience is a huge asset. I have the advantages of being to control the conditions they grow, with less chances of infestation or other outside variable.
I started with one of my favorite foods, potatoes. I grabbed a potato of each basic type I had available at the time, a brown Russet and red potato – non-GMO & organic labeled from the last time I went to the grocery. I chopped them up in chunks with each piece having skin left on it. I let them dry partially & scab up by leaving them in my oven, switch off, on a paper towel sheet for 24 hrs (though I’ve been told it’s not needed but can’t hurt).
Afterwards, I put the cuttings into a gallon Ziploc, filled with a mixture of peat moss and cactus mix or perlite, slightly damp or moist. Don’t want it sopping or dripping, at all, when the mixture is handled. Seal the bag and keep in a room temperature place.

Potato cutting in a bag. Sept 10, 2015

Potato cuttings in the bag, Sept, 10, 2015.
Here is what they looked like 9 days later….


So far I’ve made baby steps, with all positive results. I’m happy things went at smoothly as they did.
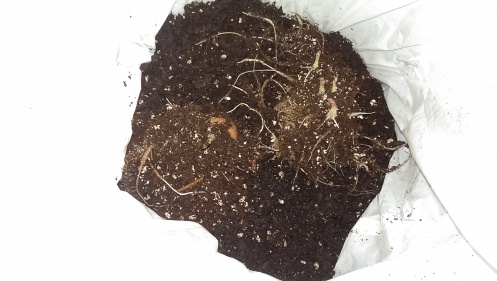
I started making my custom soil per plants I was growing… I used a 5 gallon bucket to mix the sand, perlite, soil, & bumper crop, then made individual pots with it. The plants requiring lighter soil, with sand, & Perlite….like potatoes, carrots, radishes, garlic, onions, and some fruit plants, while making the cruciferous plants’ soil heavier and packed tighter.
The potato clippings were placed in the bigger bags on top of a layer of soil. I would say about 5 to 6 inches high then covered them lightly with dirt (the blend I made). I would later add more dirt as the stalks grow, be sure to keep the soil damp to the touch at its driest but at the same time not keep its feet wet.
Potato clippings planted in a small trash can container, with holes drilled out and lined in a plastic bag, punched with holes also. Sept. 20, 2015
I kept the lights on them the entire 1st month, just focusing on having them continually growing (or so I thought -I read that plants do grow faster with dark periods. Only continuing to experiment will I know for sure.). These are the potato plants about 1 month and a half later, beautiful tall babies:


I lost an earring to another set I had made, but when I went to make the replacement, I lacked the right glass beads…. I ended up making a few other pairs, here they are:


All new brake rotor and pads put on 06 Chevy Trailblazer SS SUV…..

The set up I had laid out to do the job…

The passenger side brake caliper, I just wanted to have proof of the existing condition…. the left piston has a ripped seal around it, which may lead to premature wear and failure.
Well, I am back to my page… contemplating what to do with it…. make it a journal? I never liked sharing “truly” private thoughts, and especially to strangers. I do, however, like to voice my opinion, so on to what else to make this page…. I am a Jill of all Trades and have been a sole proprietor of my own Mobile Mechanic business, with the blessing of a beautiful daughter. I could make a page to do with the jobs I do, I suppose. A “How To” guide of some sorts? I am still unsure…. going to sleep for now, maybe the answer will come to me in a dream??
